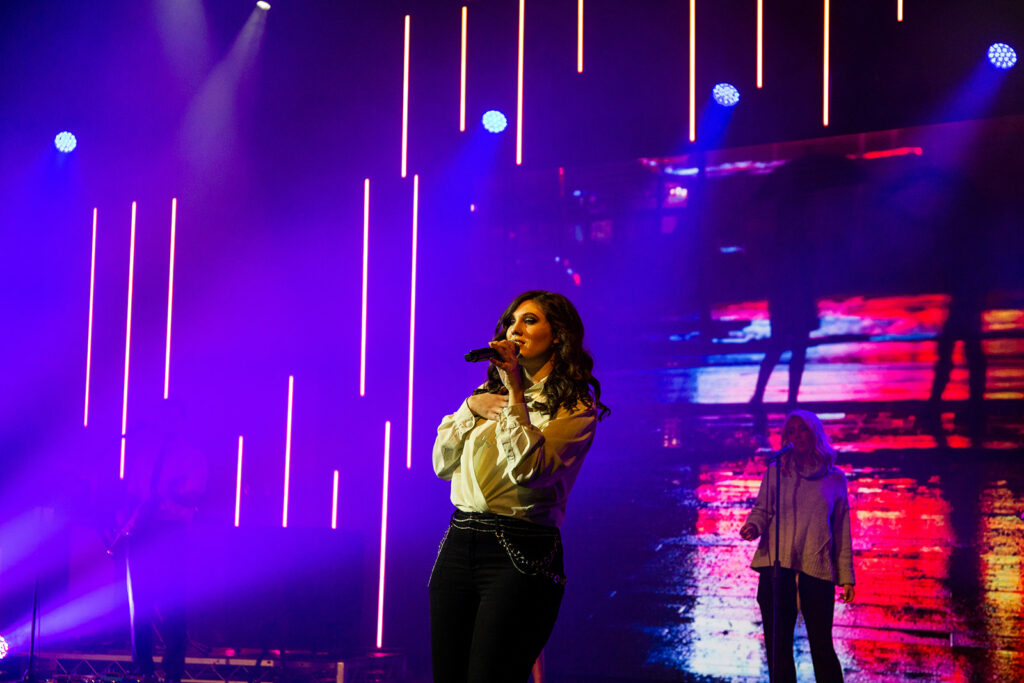
While last week I wrote about what I was doing, I never revealed the image that I would be recreating for the next nine weeks. So, this week I thought it would be a good idea to reveal the reference photo and explain a little bit about why I chose it:
When choosing an image to recreate I had to think about a few things:
- Can I use the image without fear of copyright strike? Due to caution, this meant no album covers or film posters.
- Are there people in the image? This was a priority for me, as drawing people is something I am admittedly horrible at, so I wanted something that would push me out of my comfort zone, while also allowing for the most freedom in choosing an art style to recreate the image in.
- Is it visually attractive or interesting? I wanted something that had a range of dynamics and colours, that would allow me to focus on different aspects of the image as a priority each week, and also something that would be fun to recreate.
So, this is the image I chose. Yes, it is me, but that’s actually not why I chose it. Being me is an unfortunate byproduct of hours of searching for the right picture and coming across this as the one that seemed the most interesting to me. And no, I will not be taking questions at this time, let’s focus on the art side of this.
I chose this image mainly because of how the lighting worked to create an interesting colour pattern. I love how the stage lights and background screen work together to create a moody tone, and I think it just looks pretty. Second, because yes, there are people, but they are all slightly obstructed, especially in the face, which gives me a little bit of grace while also still checking off my second point.
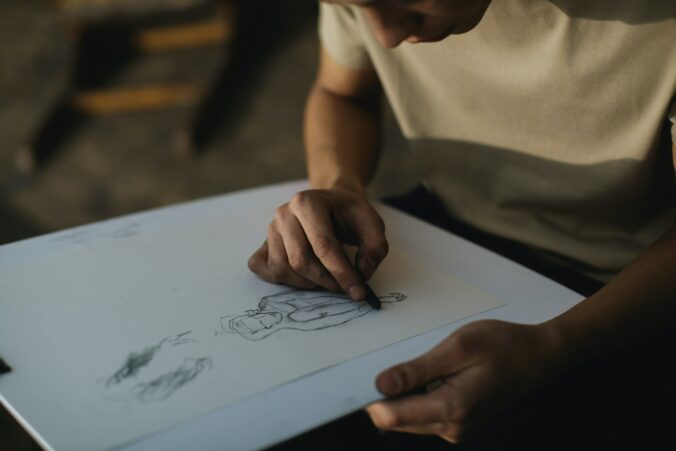
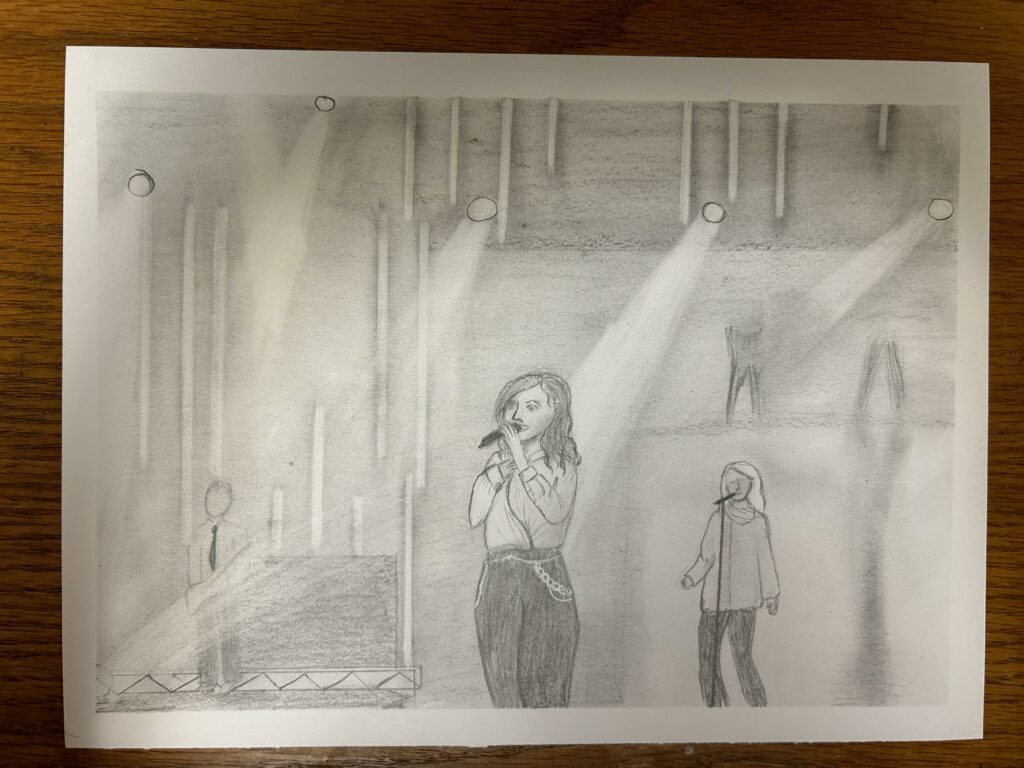
The Sketch:
This week, I started my journey with a “simple” black-and-white sketch focusing on the shadows and light in the image. I chose to begin with a sketch because I thought it would be a great way for me to create a baseline for myself for how easy or challenging this project would be. It would set both my expectations and yours, for my ability and it challenges me to do something I’ve never done before. For this first attempt was done going in blind, as I did not do any research into the basic art theories of how to create shading in a pencil sketch. As this was my first week, this was intentional as a way to see what I could figure out on my own.
You may or may not be able to tell, but this took a lot of trial and error, and I found that as I went on, my techniques got more refined. For example, I always started from the left side and worked my way right. You can notice that I used a tiny eraser for the first stage light and realized that this did not work and had to change it. I also realized that I started this drawing off with a mechanical pencil and small eraser, but as I went on I realized that this was not the best choice and switched to a regular pencil and larger eraser to help with the shading and highlights on the image.
Through this process I learned the importance of shading and how to add dimension when all you’re using is a pencil, finger, and eraser (however if I had the correct pencil and eraser I wonder if it could have been a little better). I also realized just how long this takes. What I thought would be an hour out of my evening became multiple days of effort. The final product is not good by any means. In fact, it’s actually kind of embarrassing to be putting this on the internet, and I still can’t draw people, but I am still proud of myself for stepping out of my comfort zone and trying to be creative through things that I tend to avoid.
To find my weekly reflections on this course and my learning, look Here
To find my other inquiry posts, look Here
Hey Jess,
I am so impressed by your work in this project already! I really like the shading in the pencil drawing. I can’t wait to see more 🙂